After plugging in external drives or after adding optical drives and hard drives, Windows automatically assigns a drive letter to them. Usually, the system drive is assigned the letter C: and other drives are assigned subsequent incremented letters.
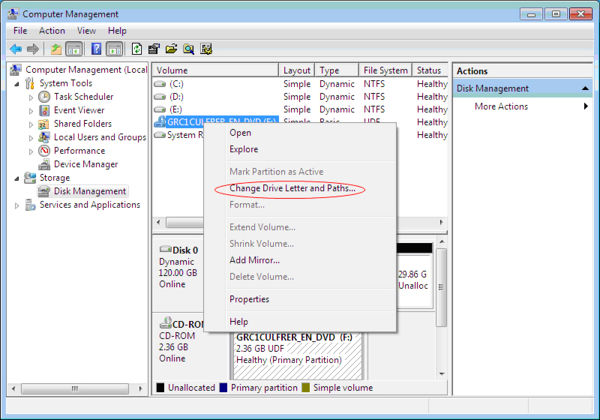
It is possible to change this auto-assigned drive letter in Windows 7/ Vista/XP. Right-click on My Computer and select “Manage”. Under Computer Management, select “Disk Management”. The right pane will contain the list of drives with the “CD-ROM” drives listed at the bottom.
Now, right-click on the drive whose letter needs to be changed and select “Change drive letters and paths…”. Click on “Change”, select “Assign the following drive letter” and select the required drive letter.
Note that the system drive letter cannot be changed.