Cloudflare Pages is an amazing service to host your SSG and static HTML websites on edge locations and serve pages with low latency around the world. However the product is still new and isn’t as full-featured as I’d want it to be. One of the deficiencies is the lack of deployment options - only GitHub and GitLab.com hosted repositories are supported seamlessly - for anything else, we need to use Wrangler or directly upload a folder or a Zip file through the Cloudflare dashboard GUI. My use-case required that I deploy from repositories on a self-hosted GitLab instance, so I needed to use Gitlab CI to deploy to Cloudflare Pages.
Step 1: Build an image with Wrangler baked-in
I like keeping things repeatable, so I end up creating an image which I can use with the Docker or Kubernetes executor. You can obviously use any executor including the Shell one, but you’ll need to have Wrangler installed in the environment you are running the job. I also like baking-in my dependencies instead of fetching them every time as I feel storage is cheap and time/CPU minutes are not. So I created a simple image from the Node 18 base image, available on DockerHub as ellimistgh/wrangler.
FROM node:18-alpine
RUN npm install -g wrangler
Note: Cloudflare keeps delaying on providing an official Wrangler image, and the most popular Wrangler image has v1 in it, so I decided to add my own into the mix.
Step 2: Build the pipeline
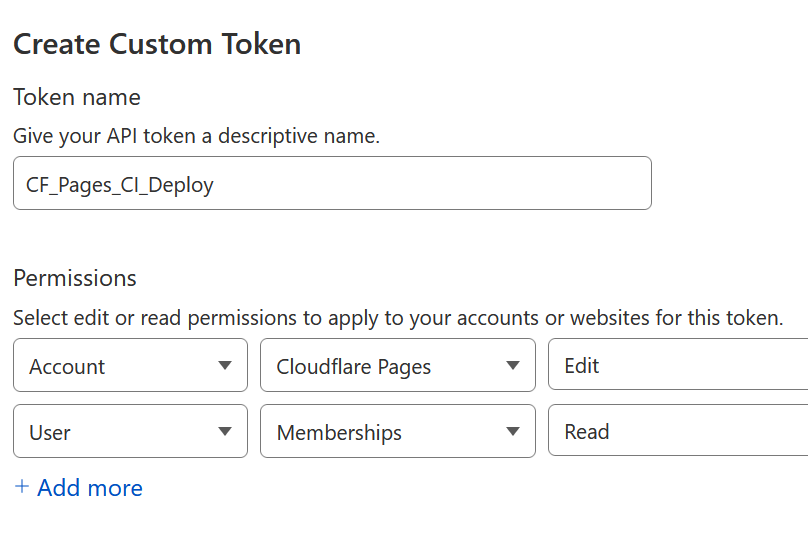
The first thing we need to do here is to generate a CloudFlare API token that’ll authenticate our CI job to be able to upload the build artifacts. Click on your profile and open your profile page and go to the API Tokens section, or use this link to there directly. Click on the “Create Token” button, and click on “Get Started” beside “Create Custom Token”, since none of the pre-built token templates apply to us. The token needs two permissions -
- “Account” permissions to “Edit” “CloudFlare Pages”, and
- “User” permissions to “Read” “Memberships”
Once the token is generated, save it as a CI/CD variable on your GitLab project with the name CLOUDFLARE_API_TOKEN. Feel free to mask and/or protect the variable, but for our uses it’s not necessary since we won’t be printing it on the console or using it from non-protected branches. (Only the main/master branch is protected by default)
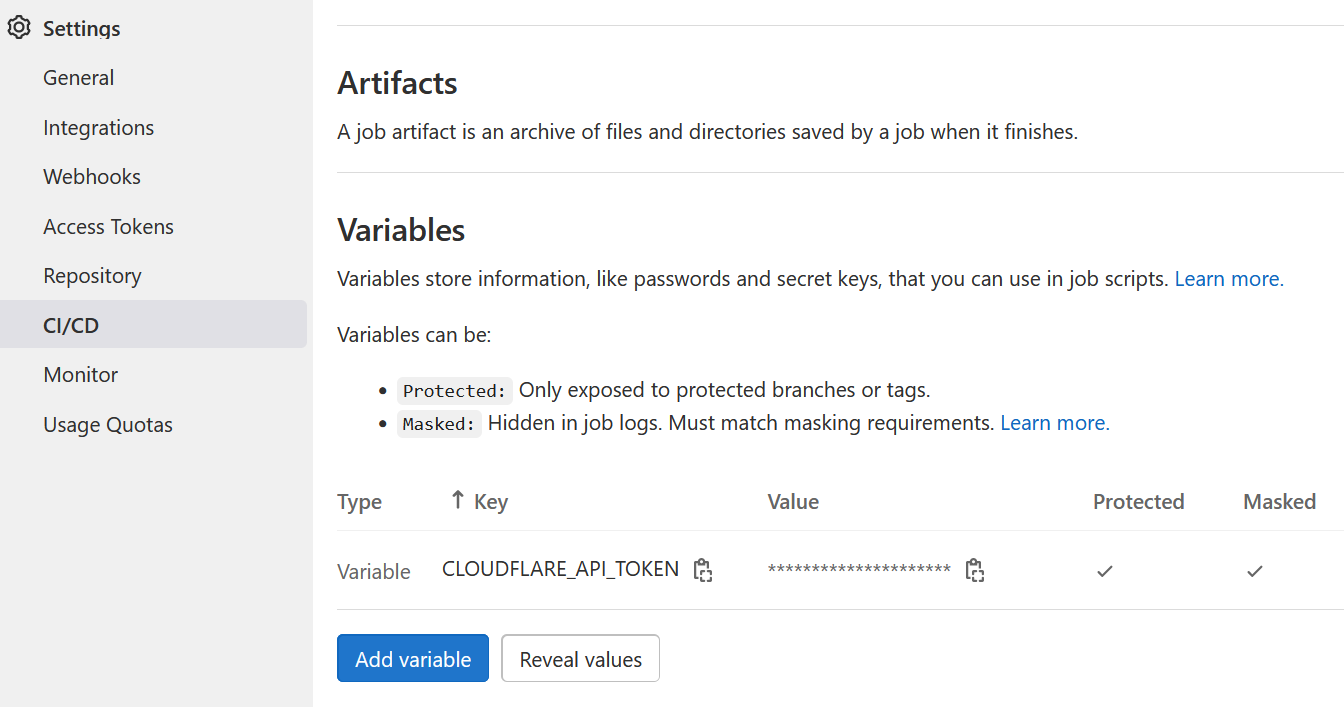
These variables are exposed as environment variables in the job environment. There are many other ways of passing Wrangler the token, feel free to use whichever you wish. Just keep in mind that it should be kept safe.
My deployment job is pretty simple and it looks like this -
deploy_cfpages:
  image: ellimistgh/wrangler:latest
  stage: deploy
  variables:
    PROJECT_NAME: my-awesome-project-name
  script:
    - rm -rf README.md .git*
    - wrangler pages publish . --project-name $PROJECT_NAME
  only:
    - main
I remove the README.md file and the .git directory and .gitlab-ci.yml file, and publish the files in the current directory (".") into the project “$PROJECT_NAME”. There’s scope for a lot of variations here. You might need to define a CLOUDFLARE_ACCOUNT_ID variable if your token spans multiple Cloudflare accounts. You might want to attach a commit-hash to this deployment, or a commit message or deploy a different branch. You can look at the different options and switches here. The only two mandatory parameters, as of now, are the directory to publish and the project name.
Note: Cloudflare has documentation for deploying with various CI tools, but Gitlab CI is unfortunately missing.